Paper Bag Easter Basket Tutorial
Want to make homemade Easter baskets for your kids this
year? For free?
I did too. When I decided to make baskets for my kids
this year I wanted something easy, affordable and recyclable. It also has to be
strong enough to be able to hold eggs during the egg hunt. This upcycled
grocery bag basket is all of these things.

And it’s not just for Easter, it’s a fully functional all purpose basket. Let’s begin.
Materials:
Paper grocery bags (about 1 and ½ per basket)
Ruler
Scissors
Glue stick
Wood Glue
Clothes pins
Step One: Cut your paper strips.

Cut the edges of your paper bag to lay it flat. Fold the
edge of the paper over once, then fold to make a 1” strip and cut the strip
from the bag. The strip should be folded at each side.

Glue the front and back sides of the strips together with
your gluestick, creasing your folds in the process.

Make 18 strips.
Step Two: Create the bottom of the basket
Lay out six strips side by side. Weave in six horizontal
strips so that woven area is centered with the strips. Adjust the strips to
make a tight weave, using clothespins as needed to hold strips in place.

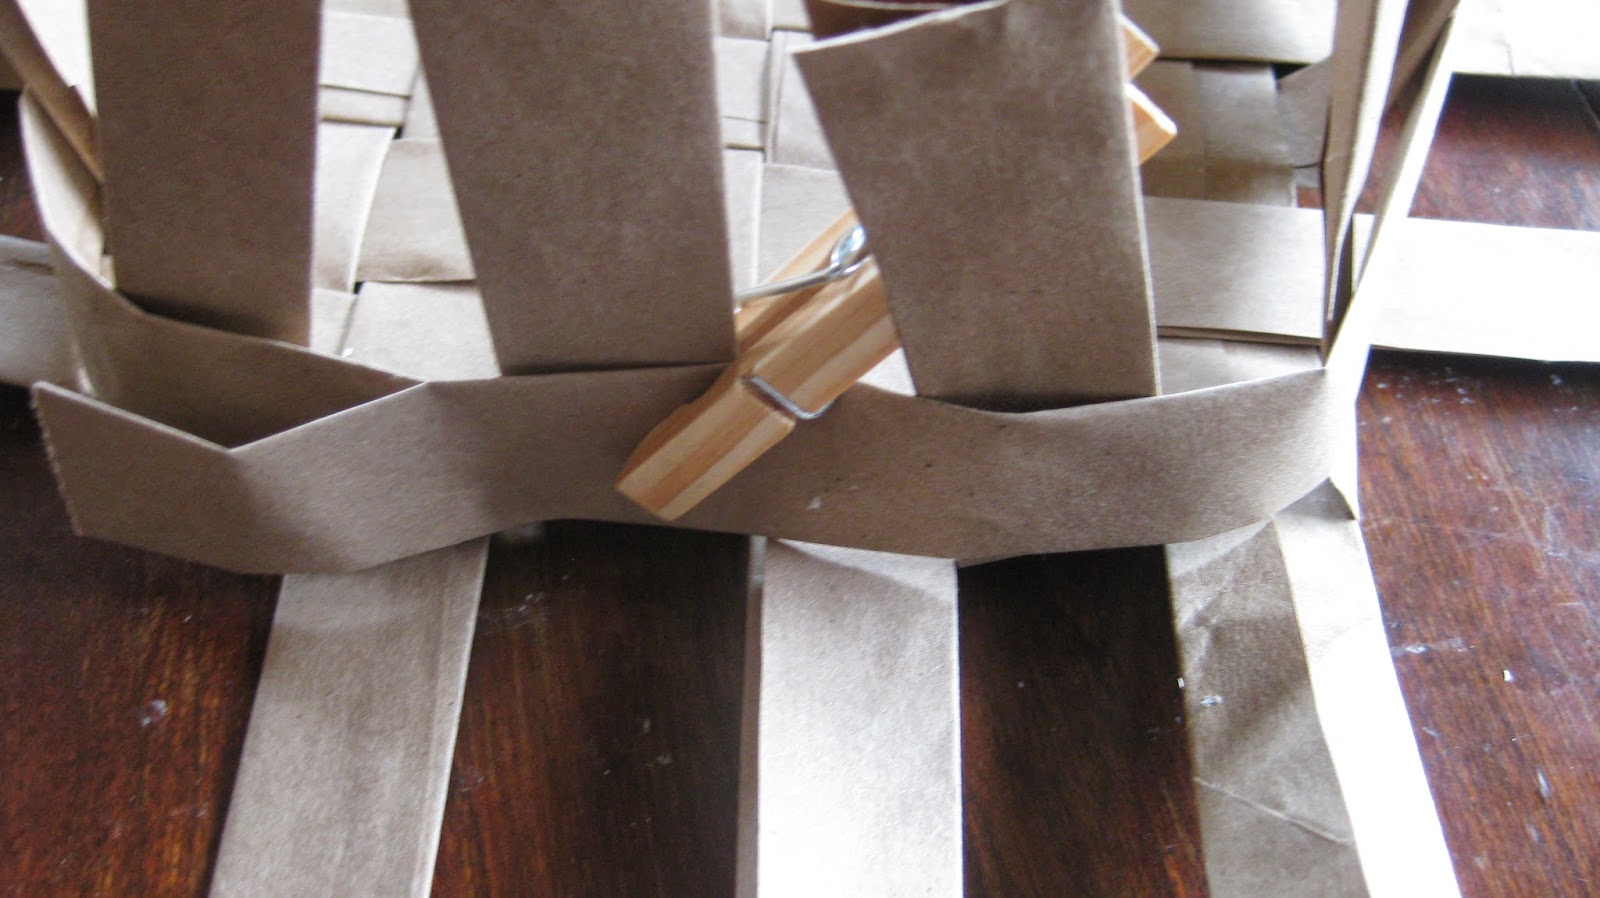
Step Three: Begin weaving the sides.

Starting in the middle of one side, begin weaving to the
end of that section. Folding the sides of the adjacent section upward, continue
weaving around the basket.
 On the side opposite the one you started on, the strip
will end. Take a second strip and overlap with the first by about 2-3” gluing
the two strips together with the gluestick. Use a clothespin to hold the
overlapping area together as the glue dries.
On the side opposite the one you started on, the strip
will end. Take a second strip and overlap with the first by about 2-3” gluing
the two strips together with the gluestick. Use a clothespin to hold the
overlapping area together as the glue dries.
When you reach your starting point with the second strip,
glue another 2-3” overlap as you did on the back side. Trim any excess.
Repeat this round two more times to complete the weaving
of the side of the basket.

As you work, push the vertical strips down to get a tight weave. Use clothespins to help hold the strips in position and keep the weave together. As you work up the basket, move the clothespins up to the next row.
Step Four: The handle
The handle is made with a cordage making technique called
the double reverse wrap.

Cut two 2” wide strips from your paper bag. Begin twisting the end on each strip then
join the two strips together in your non-dominant hand, one strip above the
other.
Starting with the top strip, twist the paper away from
you (clockwise) for a single rotation of your hand. By single rotation I mean
how far your hand naturally twists when you flip it over from palm down to palm
up.
Now bring the twisted top strip in front of the bottom
strip toward you, wrapping it counterclockwise. So the twisted strip is now on
the bottom and the other strip is now at the top.
Again, grap the top strip, twist clockwise for a single
rotation of the hand, then pull it in front of the bottom strip in a
counterclockwise direction.
Repeat for the entire length of the paper to complete the
handle.
Pinch the ends of the handle to make them easy to insert
into the sides of the basket.
Step Five: Attach Handle to Basket
This is where you get to use your wood glue! You’re going
to open two strips on opposite sides of the basket and use wood glue to attach
the ends of the handle inside.

Make sure to double check that you’re putting the handle
in the same position on each side. (It should be in the third strip from the
front on each side.)
Use clothes pins to hold the handle in strips until the
glue dries completely—about 12 hours.
Step Six: Finish the top of the basket.

You should now have a basket that has all of the vertical
strips pointing up. Fold the ends of each strip over the top row of the weave.
Glue the end in place with wood glue and secure with a clothespin until
completely dry. You’ll need 24 clothespins all together.
Step Seven (Optional): Add the Ribbon

Weave a 7/8” ribbon into the middle row on the sides of
your basket by inserting the ribbon underneath just one section of the weave on
each side. Glue the ends of the ribbon together underneath the final woven
section to secure the ribbon in place.
Step Eight: Dry and Remove Clothespins
Allow the basket to dry for at least 12 hours. Remove all
the clothes pins and enjoy!
So, you’re enjoying Handmade Life? Take a minute to vote
for me on Top Mommy Blogs.

Want more tutorials from Handmade Life? Follow me


Comments
Post a Comment